Last Updated: November 21, 2026
Quick Summary
The best abrasive brands for cabinet making in 2026 are judged on cut rate, grit progression, backing compatibility, durability, and range depth, with Sia and Festool named as lines worth comparing. Match ceramic grain to stock removal, aluminum oxide to general sanding, and silicon carbide to fine finishing.
- Ceramic grain cuts fast and cool on hardwoods but costs the most per disc.
- Aluminum oxide covers the widest grit range at mid-level cost for general sanding.
- Start veneered panels no coarser than 120 grit to protect the veneer face.
- Keep grit steps no larger than about 1.5x to 2x the previous grit number.
- A 5-inch hook-and-loop disc has roughly 19.6 square inches of usable face.
Table of Contents
- How We Evaluated Abrasive Brands for Cabinet Work
- Abrasive Types and Materials: What Actually Cuts Cabinet Panels
- The Best Sandpaper for Woodworking: Sheets, Pads, and Blocks
- Sanding Discs for Cabinet Making: Sander Compatibility and Backing
- The Best Grit Sequence for Cabinet Doors and Face Frames
- Sandpaper for Sanding Between Coats of Finish
- Cost Per Cabinet: Comparing Abrasive Value by Workflow
- Choosing Abrasives for Profiles, Corners, and Hand Sanding
- Frequently Asked Questions
How We Evaluated Abrasive Brands for Cabinet Work
Choosing among the best abrasive brands for cabinet making in 2026 comes down to one question: which discs, sheets, and pads cut cleanly, hold their edge, and fit the sanders already in your shop. Because panel stock shapes how abrasives cut and wear, choosing kitchen cabinet materials is part of planning a finish that sands cleanly with the tools already in your shop.
Abrasive is any mineral grit bonded to a backing that removes material and smooths a wood surface.
We scored brands on five practical points:
- Cut rate and finish quality on hardwood, veneered panel, and MDF
- Grit progression from coarse stock removal to fine finishing
- Backing and disc compatibility with common random orbital sanders
- Durability and loading resistance under dust extraction
- Range depth, so one brand can cover a whole cabinet workflow
Festool’s abrasive guidance explains how backing choice affects dust extraction, which is the detail most buying guides skip.
Sia Abrasives product information is worth reading before you commit to a line, since the grain and backing options differ by product family.
If you want to see the full Sia lineup in one place, you can shop all Sia abrasives and compare grits and backings directly.
Abrasive Types and Materials: What Actually Cuts Cabinet Panels
The abrasive grain decides how fast a disc cuts and how long it lasts. Three materials cover almost all cabinet work, and each suits a different stage of the job.
Ceramic, Aluminum Oxide, and Silicon Carbide Compared
Ceramic abrasive is a microcrystalline grain that stays sharp as it wears, cutting fast and running cooler on hardwoods and heavy stock removal.
Aluminum oxide is the workhorse for general woodworking. It handles hardwood, softwood, and panel products, holds up under heat, and covers the widest grit range at mid-level cost.
Silicon carbide is sharp and brittle. It excels on finish sanding, between-coat work, and harder surfaces where a fine, consistent scratch pattern matters more than long life.
| Abrasive Grain | Best Stage | Strength | Trade-off |
|---|---|---|---|
| Ceramic | Coarse stock removal | Fast cut, cool running, long life | Highest cost per disc |
| Aluminum oxide | General sanding | Versatile, wide grit range, mid cost | Slower on dense hardwood |
| Silicon carbide | Fine finishing and between coats | Sharp, consistent fine scratch | Wears faster under heavy pressure |
A common mistake is buying one grain for the whole job.
The Best Sandpaper for Woodworking: Sheets, Pads, and Blocks
For hand work, cabinet makers still reach for 9″ x 11″ sheets, sanding pads, and sanding blocks.
Aluminum oxide sheets cover general sanding and fit most hand-sanding blocks. Silicon carbide sheets suit fine finishing and between-coat work. Cloth-backed sheets resist tearing on edges and corners where paper backing fails.
- 9″ x 11″ sheets for flat panels, face frames, and general hand sanding
- Sanding pads for contoured areas and quick touch-ups
- Sanding blocks for keeping edges crisp and flat
- Sanding sponges for profiles and rounded edges
For cabinet work, keep a full grit spread on hand: coarse to flatten, medium to shape, fine to prep for finish. If you want the exact sheets we stock, browse our 9″ x 11″ sandpaper sheets in grits from coarse to fine.
Sanding Discs for Cabinet Making: Sander Compatibility and Backing
Sanding discs for cabinet making must match your sander’s pad and dust extraction setup, or the disc loads, slips, or clogs within minutes. Two backing types dominate: hook-and-loop and PSA.
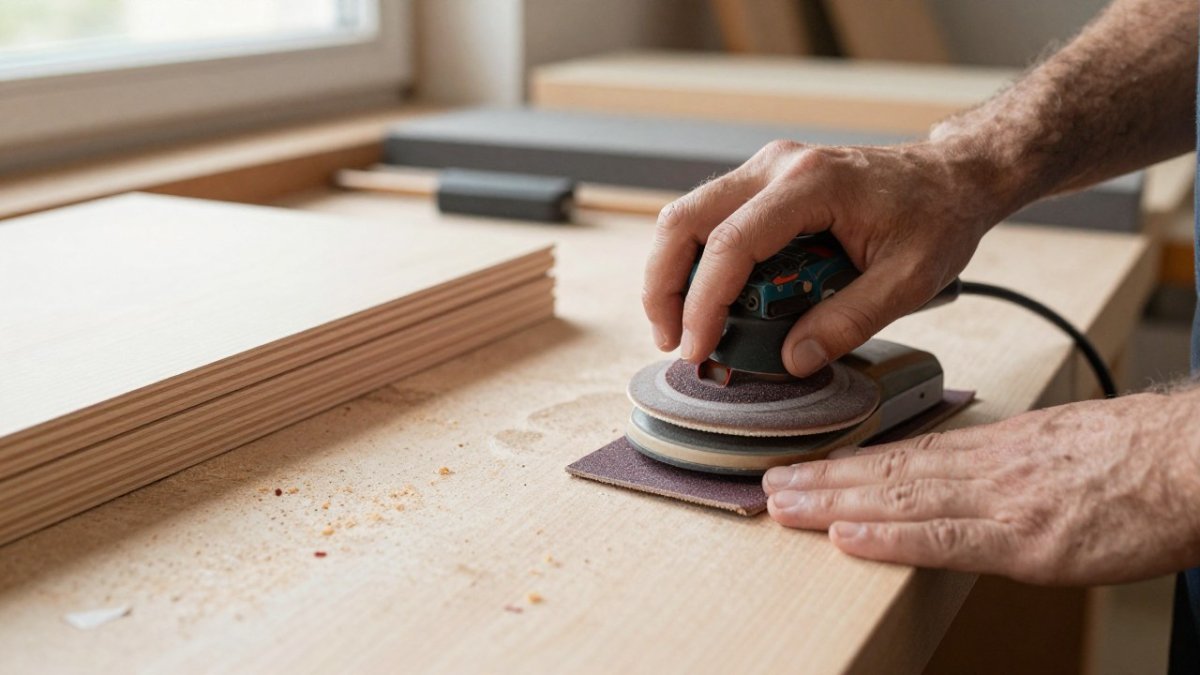
Disc compatibility comes down to diameter and hole pattern. Most cabinet shops run 5-inch discs on a random orbital sander, with 6-inch discs on larger pads.
If you are unsure which backing suits your sander, our guide to hook and loop vs PSA sanding discs walks through how each holds and how to switch a backing pad. When you are ready to buy, you can browse sanding discs in hook and loop and PSA across a full grit range.
Watch out: fitting a disc with the wrong hole pattern is the fastest way to clog a pad and burn through discs, so check the pattern against your sander before you order in bulk.
The Best Grit Sequence for Cabinet Doors and Face Frames
The best grit sequence for cabinet doors and face frames moves from coarse to fine in even steps, removing the previous scratch pattern at each stage. Skip a grit and you leave deep scratches that show the moment finish hits the wood.
A sequence that works for most painted or clear-finished cabinet work:
- Start at 80 grit to flatten panels, remove mill marks, and level face-frame joints.
- Step to 100 or 120 grit to erase the 80-grit scratches.
- Step to 150 or 180 grit for general surface preparation.
- Finish at 180 or 220 grit for paint, or 220 grit for clear finish on hardwood.
- Stop at the right grit for your finish, not the finest grit on the shelf.
Keep the step between grits no larger than about 1.5x to 2x the previous grit number. Jumping from 80 straight to 180 leaves scratches the finer grit cannot remove in a reasonable number of passes, and those scratches telegraph through thin finishes.
Grit Sequences by Cabinet Material
The right starting grit and finishing grit change with the stock:
- Solid hardwood (oak, maple, cherry): start at 80, progress 80 ? 120 ? 150 ? 180 ? 220. Hardwoods hold a scratch pattern, so do not skip the 150 step before 220.
- Veneered panel: start no coarser than 120 to protect the veneer, then 120 ? 150 ? 180 ? 220. Coarse grit on veneer cuts through the face in a single pass.
- MDF and particleboard: start at 100 or 120, progress 120 ? 150 ? 180 ? 220. MDF loads discs quickly, so change discs before the grit dulls rather than pushing a loaded disc.
- Face frames and door edges: same progression as flat panels, but with lighter pressure and a block or interface pad so you do not round over crisp edges.
Where the Sequence Goes Wrong
Watch out: the most common failure is jumping from a coarse grit to a finishing grit in one step, leaving deep scratches that only show after the first coat and force a full re-sand. The second is over-sanding MDF or veneer at coarse grits, removing more material than the panel can spare.
Sandpaper for Sanding Between Coats of Finish
Sandpaper for sanding between coats of finish should be fine enough to knock down dust nibs and level the coat without cutting through it.
Between-coat sanding is light work. Use a fine grit on a sanding pad or block, keep pressure even, and stop as soon as the surface feels smooth. Pressing hard or using too coarse a grit scuffs through the finish and forces a re-coat.
- Use fine silicon carbide for leveling cured coats
- Keep a dedicated pad for finish work so no coarse grit contaminates it
- Wipe off dust before the next coat
- Replace the sheet as soon as it stops cutting cleanly
The goal is a dull, even surface, not bare wood. Treat between-coat sanding as surface preparation, not stock removal.
Cost Per Cabinet: Comparing Abrasive Value by Workflow
Cost per cabinet is the number that separates a cheap disc from a good one. A disc that costs less but loads and dies early costs more per door than a premium disc that keeps cutting. The real measure is how many doors one disc finishes before it stops cutting cleanly; compare brands by normalizing cost by usable sanding area and by workflow.
Normalizing Cost by Usable Area
Pack prices alone do not tell you which abrasive is cheaper to run. A 5-inch hook-and-loop disc has roughly 19.6 square inches of usable face; a 6-inch disc has roughly 28.3.
Sheets work the same way. A 9″ x 11″ sheet is 99 square inches; cut into thirds for a 1/3-sheet sander, each third is 33 square inches. Compare sheet brands on cost per square inch, not cost per sheet, because sheet sizes and counts vary between lines.
Cost by Workflow
Value depends on your workflow, and the same disc can be a bargain in one stage and a waste in another:
- Heavy stock removal (flattening, joint leveling): pay for durability. A ceramic disc that outlasts cheaper aluminum oxide by a wide margin is cheaper per door even at a higher per-disc price, because you change discs less often.
- General sanding (shaping, intermediate grits): balance cost and life with aluminum oxide; the mid-priced line usually wins on cost per door.
- Fine finishing and between coats: prioritize scratch consistency over disc life. Silicon carbide wears faster but cuts a cleaner, shallower scratch, so fewer re-coats are needed.
- Mixed workflow: keep a full grit spread rather than one premium line, and put the premium grain only where it pays back.
Tracking Real Cost Per Cabinet
To control cost, track how many doors each disc finishes and where it loads first. That tells you whether you are overpaying for life you do not need or underpaying for discs that quit early. A simple shop log of doors per disc by grit and material will show within a few jobs which brand is actually cheaper to run.
Pricing depends on quantity, grit, and backing, so request a quote for current figures.
Choosing Abrasives for Profiles, Corners, and Hand Sanding
Abrasives for profiles, corners, and hand sanding need flexibility that flat discs cannot offer. Sanding sponges and flexible pads follow curves, while sheets and blocks keep edges crisp.
For raised panels, moldings, and rounded edges, a medium-grit sanding sponge shapes the profile without gouging it.
- Sanding sponges for profiles and rounded edges
- Flexible pads for contoured surfaces
- Folded sheets for inside corners
- Sanding blocks for flat edges and crisp lines
If you need sponges, rolls, and sheets together for hand and profile sanding, our sandpaper sheets, rolls, and sanding sponges range covers the grits and formats cabinet shops use most.
Watch out: using a stiff block on a profile rounds the detail you worked to shape, so switch to a sponge before you reach the curves.
Frequently Asked Questions
What is the best sandpaper brand for cabinet making?
There is no single winner, because the right abrasive brands depend on your workflow. For random orbital sanding of cabinet panels, ceramic abrasives are generally known for holding their cut on hardwood. For hand sanding profiles and corners, cloth-backed aluminum oxide sheets last longer than paper.
Are ceramic or aluminum oxide abrasives better for woodworking?
Ceramic grain cuts faster and stays sharp longer on hardwood, which makes it the better choice for coarse stock removal and flattening panels. Aluminum oxide costs less and handles general sanding, paint prep, and between-coat work well. Many cabinet shops run ceramic for the low grits and aluminum oxide or silicon carbide for finer grits and finish sanding. Matching the grain to the step keeps cost per cabinet down without sacrificing finish quality.
What grit sandpaper should cabinet makers use between coats of finish?
Between coats, most cabinet shops sand lightly with 320 to 400 grit, or use a fine sanding pad or synthetic abrasive pad. The goal is to knock down dust nibs and level the finish, not to cut through it. Use light pressure and clean the surface with a tack cloth before the next coat. For primer, step down to 220 to 320 grit so the primer scuffs evenly without clogging the paper.
How do cabinet makers choose abrasives for orbital sanders?
Start with disc compatibility: check the sander’s disc diameter, hole pattern for dust extraction, and backing type, usually hook-and-loop. Five-inch discs are common on random orbital sanders in cabinet shops. Match the abrasive grain and grit to the material and step, and use a multi-hole pattern that lines up with the sander’s extraction. A sample kit is a low-cost way to test cut rate, loading, and disc life on your own panels before committing to bulk.